I've been sewing, sewing, sewing!
In January, Meg and I chose fabric and pattern for Everly's birthday dress (shown also in my previous post). Fabric was from Hobby Lobby--Meg's choice. I used the XL baby size and this little dress barely fit once a t-shirt was added underneath. Gosh, our little girl is growing!
I studied the body measurements for both babies large and extra large vs. toddler size 1. Although the stated measurements were similar, the actual pattern pieces for the 1T were appreciably larger. Time to hit the pattern sales!
Here is McCall's 5416 View B (size 1T) also in fabric from Hobby Lobby, this time my choice.
I haven't seen it on our girl yet, so I'm still unsure about sizing.
My (step) grandson Isaiah adores Transformers, so I put together a quick shirt for him.
The fabric was a peculiar blend purchased from eBay. I'm hoping it's comfortable to wear. Isaiah is four-years-old.
Trinity, my step granddaughter (age 8) loves anything I make her. She tells everyone how much she likes "homemade" clothes. Trin is Everly's big sis, so I used some of the birthday dress fabric in this denim jumper.
Finished the hem today, so she'll get it tomorrow to wear to school next week, weather permitting. Our high of 81 today is being replaced by a high of 18 tomorrow! Yowzy!
Saturday, March 1, 2014
Friday, January 31, 2014
I'm baaaackkkk!
Anyone who attempts blogging knows that posting regularly can be a huge challenge! I SO admire folks who manage to do so on a daily or even weekly basis. With my sewing energy recently renewed, I'm going to try being a bit more consistent in posting.
Projects completed and in progress include a dress for my sweet grandbaby's first birthday, major tweaking of a leggings pattern for me, pj pants for my 32-year-old sons, and athletic pants for them as well. Today is a busy day, but this weekend I'll be adding photos and some lessons learned about the leggings pattern and fitting someone from halfway across the country!
Oh, and one more thing. The ETA SewExpo is coming in March. You won't believe it, but my sewing buddy and I are taking the bra-making class AGAIN. We decided we needed the skills refresher and a mojo boost! To add to the fun of the girls' weekend, I've challenged her to bring/wear only handmade panties and sleepwear stitched up since January 1st, 2014. Wait til you see the beautiful fabric I bought for a gown!
Projects completed and in progress include a dress for my sweet grandbaby's first birthday, major tweaking of a leggings pattern for me, pj pants for my 32-year-old sons, and athletic pants for them as well. Today is a busy day, but this weekend I'll be adding photos and some lessons learned about the leggings pattern and fitting someone from halfway across the country!
Oh, and one more thing. The ETA SewExpo is coming in March. You won't believe it, but my sewing buddy and I are taking the bra-making class AGAIN. We decided we needed the skills refresher and a mojo boost! To add to the fun of the girls' weekend, I've challenged her to bring/wear only handmade panties and sleepwear stitched up since January 1st, 2014. Wait til you see the beautiful fabric I bought for a gown!
Monday, April 8, 2013
Just for fun: Woody!
Here is a quick video of Woody, our 9-month-old chihuahua, desperately trying to get the "toys" on the bottom of his water dish.
Silly Woody
Silly Woody
Sunday, March 24, 2013
Bras and Step-Ins
Last month a friend and I took a bra making class that reset my sewing agenda! I was absolutely amazed that I could produce such a great fitting bra. Filled with courage, I decided to attempt a pair of panties. Kwik Sew's Beautiful Lingerie (the book) includes a pattern for a high-cut panty. My (former) favorite underwear was Jockey's cotton hi-cuts.
According to Kwik Sew's sizing chart, I wear an XL. This is how my Jockey's compared with that first cut out.
So...the sizing chart got tossed! I folded the Jockey's in half and laid it along side the multi-sized pattern. Despite my skepticism, I cut out the medium based on that comparison. But, I used an old t-shirt this time instead of fashion knit!
I placed a blue dot on crotch piece #2 at this point because I wanted to figure out whether it became the outer crotch or the crotch liner.
I wasn't very surprised because I have to adjust the front waist of pants patterns. Using my fashion curve ruler, I easily decreased the center front by about 1 inch, tapering to nothing on the side.
The nice thing about this first pair is that I can wear them! And what a pleasant surprise it was to learn a new use for old t-shirts. Very comfy!
As soon as I adjusted the panty front pattern piece, I gambled and cut out a second pair from a fashion knit (90% poly 10% spandex). These went together quickly and were finished in about 90 minutes. The fit is right on, so I now have a TNT (tried and true) hi-cut panty pattern. Yay for me!
Seriously, if you've ever flirted with the idea of making your own panties, give it a try. The comfort of having just the right amount of elasticity in the waist is reason enough to swear off RTW panties forever!
According to Kwik Sew's sizing chart, I wear an XL. This is how my Jockey's compared with that first cut out.
![]() |
| Jockey sz 8 / Kwik Sew sz XL |
Kwik Sew's sewing instructions are very clear, although I flipped between the elastic description and the sewing steps.
At this point, you tuck crotch piece #2 under panty back while crunching panty pieces together until the crotch piece comes up over the top of panty front. Then add the edge of crotch piece #2 to the pinned area.
I placed a blue dot on crotch piece #2 at this point because I wanted to figure out whether it became the outer crotch or the crotch liner.
This is important to know when sewing panties with a fashion knit but cotton crotch.
The finished muslin ended up being too big in front.
![]() |
| panty front |
The nice thing about this first pair is that I can wear them! And what a pleasant surprise it was to learn a new use for old t-shirts. Very comfy!
As soon as I adjusted the panty front pattern piece, I gambled and cut out a second pair from a fashion knit (90% poly 10% spandex). These went together quickly and were finished in about 90 minutes. The fit is right on, so I now have a TNT (tried and true) hi-cut panty pattern. Yay for me!
Seriously, if you've ever flirted with the idea of making your own panties, give it a try. The comfort of having just the right amount of elasticity in the waist is reason enough to swear off RTW panties forever!
Tuesday, March 12, 2013
The Cutest Diaper Bag...EVER!
Lola Bea Diaper Bag from Sew Much Ado
The instructions for this bag are excellent with one exception. In the step-by-step photos/instructions, the designer refers to the pieces by name (for example, side gusset) instead of piece number. My solution (for future reference) was to write the piece numbers on each of the instruction photos. If you make this gorgeous bag, do yourself a favor and write those numbers in BEFORE you begin sewing. I didn't photograph every phase of construction, but do want to share a few pics so you can see how cute the fabric choices turned out. My daughter Meg gets all the credit for this!
I guess you can tell that I am a VERY proud grandma!
The instructions for this bag are excellent with one exception. In the step-by-step photos/instructions, the designer refers to the pieces by name (for example, side gusset) instead of piece number. My solution (for future reference) was to write the piece numbers on each of the instruction photos. If you make this gorgeous bag, do yourself a favor and write those numbers in BEFORE you begin sewing. I didn't photograph every phase of construction, but do want to share a few pics so you can see how cute the fabric choices turned out. My daughter Meg gets all the credit for this!
![]() |
| Isn't this the cutest fabric combo? Cotton duck (chevron) and cotton print, both from Hobby Lobby |
![]() |
| strap is long enough for cross-body (check the length before cutting if you are taller than 5'3") |
![]() |
| Tons of room inside with 5 elastic pockets and 1 zippered pocket |
I guess you can tell that I am a VERY proud grandma!
Tuesday, May 8, 2012
The Happy Pants Parade?
I just read a post on PR by a fellow sewist who finally mastered a pants fitting. Another member noted that she too was on her way to join the happy pants parade.
Well! I hope there's room for me because, come hell or high water, I'm going to end up with a pants pattern that fits. More on this later...
Wednesday, May 2, 2012
The Old Crotch-depth Blues
I consider it progress that I no longer wince when saying/writing "crotch depth." Taking a break from the quest for a perfectly fitted shirt, I decided to whip up a 1-hour pattern for drawstring capri pants. Found a nice chocolate brown stretch poplin on sale for this project.
This is a Simplicity pattern, one I've never used before. I chose this style because I have several pair of RTW like it and they are comfortable. Little about my shape has changed since I last made pants about a year ago. So, imagine my surprise when I slipped into the tissue-fit right leg and found the center back waist a good 4 inches from my own waist!
I was perplexed, to say the least. After researching pants modifications online and in my different books, I decided to blaze a new trail. The biggest gap I could find in the research was about 1 inch, so the suggested pattern tweaks didn't seem like they would get the job done.
Here is what the back pattern piece looked like when I finished:
I know it's crazy, but if you look closely, you can see the grainline goes off to the right just above the massive tuck/wedge thingy. Believe it or not, the stitched up pants actually fit! I posted this picture along with requests for comments on the Pattern Review board. Several kind folks referred me to an adjustment that does a slash/spread about where I added the 3". May have to try that one since it would keep the side seam straight.
So in the next few days, I'll be putting together a muslin of this Silhouettes pattern. With any luck, I'll perfect the remedy for the old crotch-depth blues!
Sunday, March 11, 2012
Getting that Embroidery Mojo
After slaving over the muslin and finished garment of the princess seamed shirt, I was delighted to see a 40% off coupon code in my email for Embroidery Library. Here are my latest treasures:
In-the-hoop pin cushion
The wrist cushion I'm using now was tweaked from a purchased one whose plastic wristband was too tight. I simply attached the cushion to a 1-inch piece of elastic and closed the ends. Problem: the pins go straight through the cushion into my wrist! I look like I did back in the cat owning days! Sooooo, I'm going to make this one and attach it to a plastic disk. I'm thinking of using the lid to one of the small Glad/Rubbermaid containers.
In-the-hoop Small Scissors Case
Just couldn't resist!
In-the-hoop Coffee Sleeve
Yes, I'm on an in-the-hoop mission! Been wanting to make one of these but waited until I had the large hoop (6x12). Fun!
6x8.5 inch design
I'm thinking aprons, here.
Just a few of my latest purchases. I'll add more later.
Selected, ordered, downloaded...with a chihuahua on my lap!
Wednesday, March 7, 2012
The Joys and Sorrows of Fitting a Muslin
I just posted on PR about the inordinate amount of time it's taking me to fit the muslin for this classic blouse. As I said there, today is the second day I've devoted to this project. With so many areas to tweak (forward shoulders, full bust, no waist...and the list goes on), it makes me tired just getting it all out to work on.
So, why do it?
Any woman who has spent a significant amount of money on a ready-to-wear blouse that almost fits should appreciate the fitting endeavor. The idea, of course, is to painstakingly make and remake this muslin until the final pattern draft can be used many times over. This "new" pattern becomes a TNT (tried and tested or tried and true).
Oh, and, heaven forbid, don't lose/gain any weight! The prospect of having to start anew is motivation enough to count those calories. :)
P.S. This kind of project takes twice as much time when you have a chihuahua on your lap.
So, why do it?
Any woman who has spent a significant amount of money on a ready-to-wear blouse that almost fits should appreciate the fitting endeavor. The idea, of course, is to painstakingly make and remake this muslin until the final pattern draft can be used many times over. This "new" pattern becomes a TNT (tried and tested or tried and true).
Oh, and, heaven forbid, don't lose/gain any weight! The prospect of having to start anew is motivation enough to count those calories. :)
P.S. This kind of project takes twice as much time when you have a chihuahua on your lap.
Wednesday, February 15, 2012
Some photos
Jammies (knit) for Wilson Everett, Trinie's CPK preemie. Found vintage (1982) Butterick patterns for CPK clothing on eBay. :)
No loop turning required...RTW apron. (I'm thinking this is the way to go.)
My son the chef wanted a quick message to the servers at his restaurant.
Another CPK outfit, baby flannel.
No loop turning required...RTW apron. (I'm thinking this is the way to go.)
My son the chef wanted a quick message to the servers at his restaurant.
Another CPK outfit, baby flannel.
Turning a Loop...or not
Does your mind ever grab a random thought and just kind of take off, like Alice down the rabbit hole? This happened to me yesterday while working on an apron for my son. The pattern is for a simple butcher's apron and he'd requested some embroidery. The fabric is 100% cotton Chinese twill, fairly heavy.
To assemble the neck strap and ties, the instructions said to "turn a loop using a loop turner." Now, I've never bought one of those because a safety pin generally works just fine. After about 10 minutes trying to work the safety pin through the neck strap, I'd turned about 1 inch! My fingertips were getting sore and so was I. A quick search on the Web found a suggestion for adding a length of ribbon to the safety pin. In all, it took more than 20 minutes to turn that 14 inch strap!
As I sat looking at the tie straps, I knew there was no way I was going through that again. And that was when I realized I did not HAVE to turn the loop, no matter what the revered instructions said. Instead, I pressed the two long edges in about 3/8" and folded the strap in half lengthwise. It took about 4 minutes to press and stitch both straps and, for what it's worth, they look just fine, thank you.
And this is point at which my thoughts tumbled down the rabbit hole! I'd had to actually give myself permission to NOT follow the printed instructions. At what point in my life had I first done this without guilt, I wondered. Since childhood I've been nearly neurotic about not making a mistake; talk about an emotional burden! It's always been absolutely essential to color inside the lines. My doodles bear witness to this---never random squiggles, but rather precise geometric shapes, connected and shaded with close attention to symmetry.
Perhaps it was while cooking that I first deviated from the recipe. It would be nice to say that my innovations always yielded grand results. The truth is that more than one dish ended up in the garbage. And yet dismay from wasting the food did not keep me from risking failure again. It's more like risking success, right?
I walked against the current in the 80s when I chose to let my twin sons self-wean from breastfeeding, secretly enjoying the horrified expressions of observers when my boys tugged at my blouse and proclaimed, "Mama, I need to nurse NOW!" No regrets all these 20-something years later.
This is the year of my sixtieth birthday. Although I don't consider myself old, it's likely time to wear purple (with heartfelt thanks to Jenny Joseph) and attempt anything I want with a chihuahua on my lap.
To assemble the neck strap and ties, the instructions said to "turn a loop using a loop turner." Now, I've never bought one of those because a safety pin generally works just fine. After about 10 minutes trying to work the safety pin through the neck strap, I'd turned about 1 inch! My fingertips were getting sore and so was I. A quick search on the Web found a suggestion for adding a length of ribbon to the safety pin. In all, it took more than 20 minutes to turn that 14 inch strap!
As I sat looking at the tie straps, I knew there was no way I was going through that again. And that was when I realized I did not HAVE to turn the loop, no matter what the revered instructions said. Instead, I pressed the two long edges in about 3/8" and folded the strap in half lengthwise. It took about 4 minutes to press and stitch both straps and, for what it's worth, they look just fine, thank you.
And this is point at which my thoughts tumbled down the rabbit hole! I'd had to actually give myself permission to NOT follow the printed instructions. At what point in my life had I first done this without guilt, I wondered. Since childhood I've been nearly neurotic about not making a mistake; talk about an emotional burden! It's always been absolutely essential to color inside the lines. My doodles bear witness to this---never random squiggles, but rather precise geometric shapes, connected and shaded with close attention to symmetry.
Perhaps it was while cooking that I first deviated from the recipe. It would be nice to say that my innovations always yielded grand results. The truth is that more than one dish ended up in the garbage. And yet dismay from wasting the food did not keep me from risking failure again. It's more like risking success, right?
I walked against the current in the 80s when I chose to let my twin sons self-wean from breastfeeding, secretly enjoying the horrified expressions of observers when my boys tugged at my blouse and proclaimed, "Mama, I need to nurse NOW!" No regrets all these 20-something years later.
This is the year of my sixtieth birthday. Although I don't consider myself old, it's likely time to wear purple (with heartfelt thanks to Jenny Joseph) and attempt anything I want with a chihuahua on my lap.
Monday, February 6, 2012
NO picture could express the words
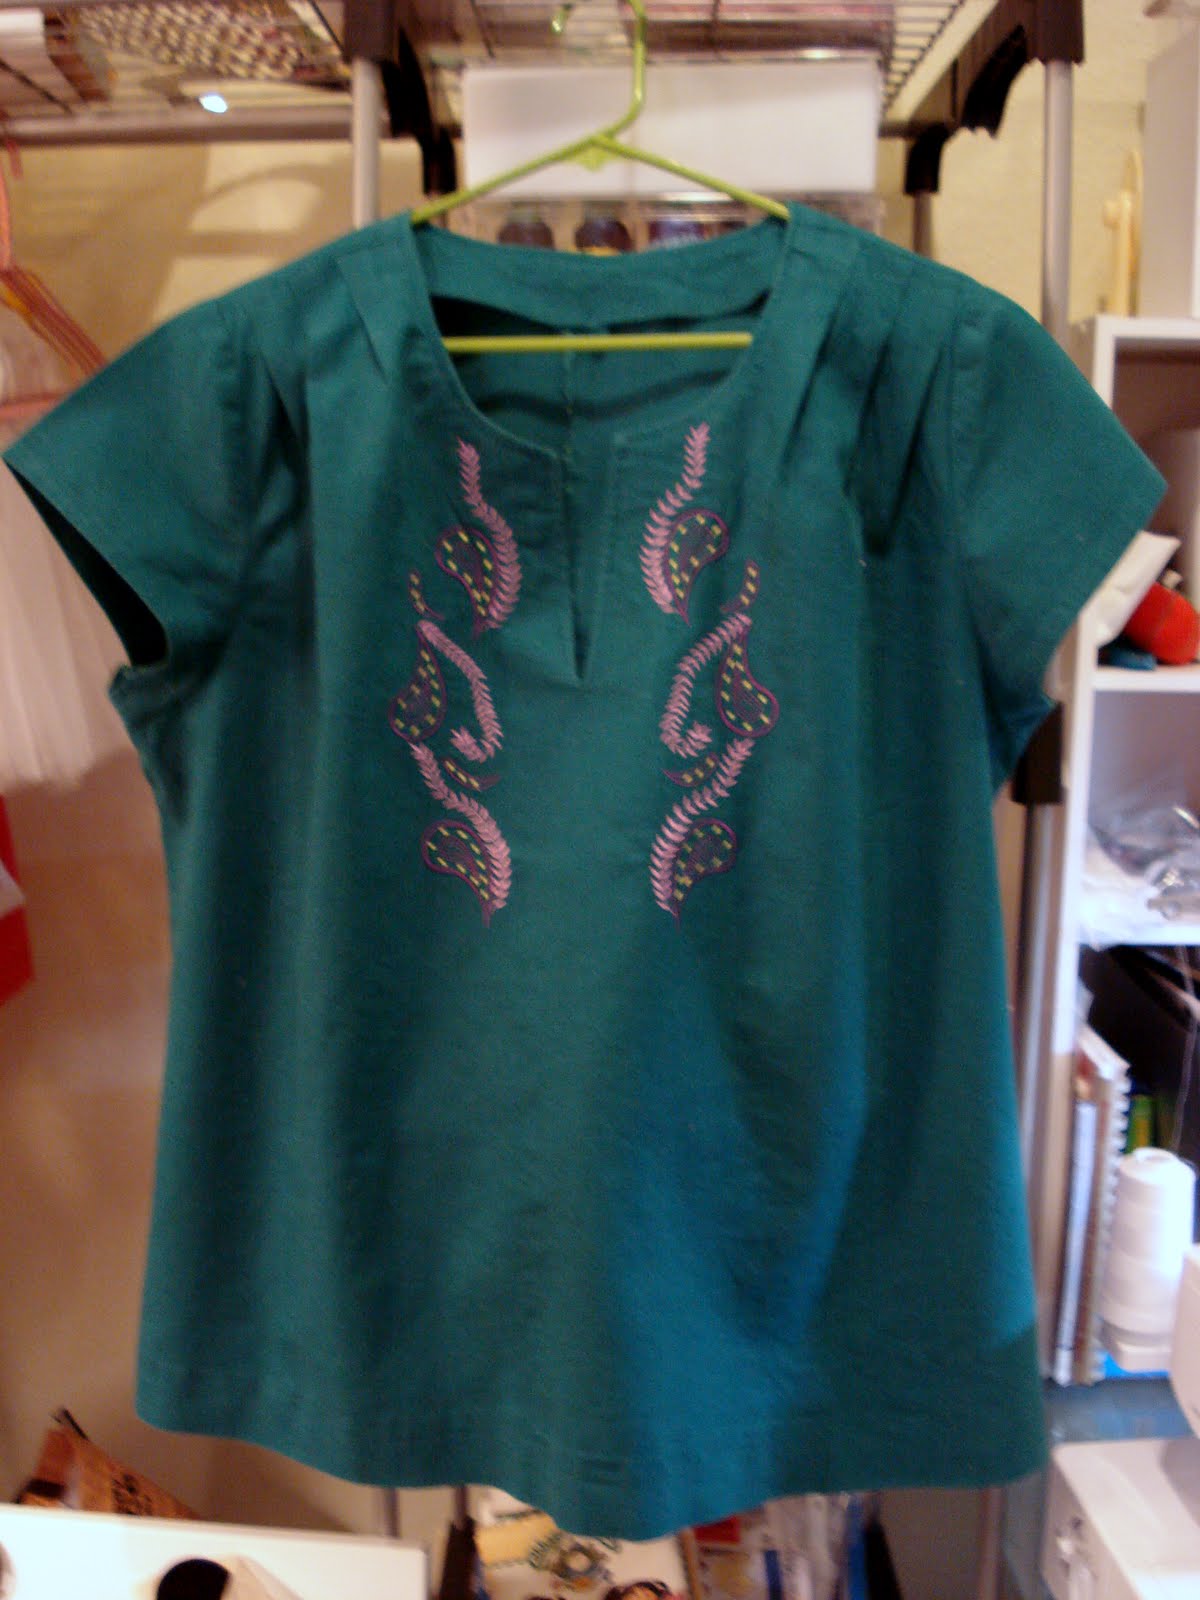
I'm writing tonight to update a few sewing/embroidery projects that have kept me busy for the past week. First of all, the tunic top came through a design placement mishap remarkably well. I was so incredibly disappointed since I really worked at getting it right. Although it's said that one picture can express a thousand words, trust me when I tell you NO picture could express some choice words I had for the whole project at one point!
Somehow, I aligned the paisleys with the neckline facing instead of the v-neck! Anyone with embroidery knowledge will likely notice the problem, but, thanks to some quick thinking ladies from my embroidery bee, I applied a "fix" that saved the day. In the photo below, imagine the design minus the upper paisleys on each side of the v-neck. Yep, basically boob paisleys! Using editing software, I was able to isolate just one paisley and fern to fill the void. And best of all, the tunic fits really well! I'll post a picture of it on a live model later, I promise.
My other projects were really fun! I'm so enjoying having a new granddaughter! My lovely daughter acquired Trinity by marrying her daddy, so I got to jump right in with a six-year-old! I have been having WAY too much fun sewing for her and our other baby girl, three-year-old Eva.
Below you'll see the cutest circle skirt and accompanying petticoat.
Sewing with tulle was a pain, for sure. I chose white so that she can wear it with other outfits down the line. I'm reveiwing all these patterns for www.patternreview.com, if you are interested in more construction details. The cupcake fabric has glitter!
The apron dress is for Valentine's Day. I just finished the buttonholes and hem tonight.
The embroidery design is from a vintage stitch collection. It reminds me of cup towels my grandmother used to make. :)
Oh, and did I mention all four projects were accomplished with a chihuahua not only on my lap, but also on my chest, my shoulder, and my feet (all the same sweet doggie)?
Somehow, I aligned the paisleys with the neckline facing instead of the v-neck! Anyone with embroidery knowledge will likely notice the problem, but, thanks to some quick thinking ladies from my embroidery bee, I applied a "fix" that saved the day. In the photo below, imagine the design minus the upper paisleys on each side of the v-neck. Yep, basically boob paisleys! Using editing software, I was able to isolate just one paisley and fern to fill the void. And best of all, the tunic fits really well! I'll post a picture of it on a live model later, I promise.
My other projects were really fun! I'm so enjoying having a new granddaughter! My lovely daughter acquired Trinity by marrying her daddy, so I got to jump right in with a six-year-old! I have been having WAY too much fun sewing for her and our other baby girl, three-year-old Eva.
Below you'll see the cutest circle skirt and accompanying petticoat.
Sewing with tulle was a pain, for sure. I chose white so that she can wear it with other outfits down the line. I'm reveiwing all these patterns for www.patternreview.com, if you are interested in more construction details. The cupcake fabric has glitter!
The apron dress is for Valentine's Day. I just finished the buttonholes and hem tonight.
The embroidery design is from a vintage stitch collection. It reminds me of cup towels my grandmother used to make. :)
Oh, and did I mention all four projects were accomplished with a chihuahua not only on my lap, but also on my chest, my shoulder, and my feet (all the same sweet doggie)?
Tuesday, January 31, 2012
Stretching My Skills
A few weeks ago I wore a ready-to-wear (RTW) tunic to an embroidery club meeting and was asked if I made it. The shirt is lightweight denim with beautiful cutwork embroidery and beading around the front neckline. The program that night was embellishing t-shirt necklines. So, I began thinking about giving this neckline thing a go!
Here's the pattern I chose: Tunic Top - View B The fabric is a gorgeous shade of dark teal linen blend from JoAnn's. I made a muslin first and worked out a good fit, I hope. I purchased some neckline designs and decided to follow some great advice from a fellow embroiderer to trace the front of the shirt onto the fabric, do the embroidery, THEN cut that piece out. Her reasoning is that the fabric is much easier to hoop before cutting it out. Makes sense, right?
Today is embroidery day! I'm taking pictures as I go and will post them all once I finish. Wish me luck!
Here's the pattern I chose: Tunic Top - View B The fabric is a gorgeous shade of dark teal linen blend from JoAnn's. I made a muslin first and worked out a good fit, I hope. I purchased some neckline designs and decided to follow some great advice from a fellow embroiderer to trace the front of the shirt onto the fabric, do the embroidery, THEN cut that piece out. Her reasoning is that the fabric is much easier to hoop before cutting it out. Makes sense, right?
Today is embroidery day! I'm taking pictures as I go and will post them all once I finish. Wish me luck!
Monday, January 30, 2012
Why this title?
I've tinkered with blogging for a couple of years now and haven't been committed enough to sustain any of them. 2012 shows promise for being memorable on several fronts, not the least of which is the advent of my 60th birthday. Of course, I thought that when I retired from teaching in 2010 and again in 2011 when my lovely daughter married. More often than not, anything I wrote about (indeed, even the act of writing) took place with a chihuahua on my lap (if said activity involved sitting for ANY length of time).
My passion right now is sewing, including machine embroidery. Entering my second year of embroiderying, I bought a used Babylock Ellegante (researched with a chihuahua on my lap, of course) and decided to "get serious." We shall see...
Want to know a little more about me? the chihuahua? Stay tuned.
My passion right now is sewing, including machine embroidery. Entering my second year of embroiderying, I bought a used Babylock Ellegante (researched with a chihuahua on my lap, of course) and decided to "get serious." We shall see...
Want to know a little more about me? the chihuahua? Stay tuned.
Subscribe to:
Posts (Atom)